Table of Contents
ToggleA stone accent wall can turn a bland living room into a showstopper, one that stops guests mid-conversation and anchors the entire space with texture, warmth, and visual weight. Whether you’re aiming for rustic farmhouse charm, sleek modern minimalism, or something in between, stone gives you that instant “wow” factor that paint and wallpaper just can’t match. But here’s the reality: not all stone walls are created equal, and choosing the wrong material or installation method can turn your dream feature into a costly headache. This guide walks through the most popular stone wall types, breaks down real-world design ideas for different living room styles, and helps you decide whether to DIY or call in the pros.
Key Takeaways
- Stone accent wall ideas offer durability, texture, and timeless design appeal that outlast paint trends while adding real home value.
- Natural stone veneer costs $8–$20 per square foot, while manufactured stacked stone runs $6–$12 per square foot, so material choice directly impacts your budget.
- Match your stone wall material to your design style—smooth neutral veneer for modern spaces, rough fieldstone for rustic farmhouse, or dark stacked stone for industrial lofts.
- A stone accent wall requires proper wall substrate (cement board over studs), correct mortar type (Type S), and sealing to prevent stains and moisture damage.
- DIY installation takes 15–25 hours for a 100 sq ft wall if you have masonry experience, while professional installation costs $15–$40 per square foot but guarantees quality finish.
- Accent wall placement and lighting are critical—position behind a TV or fireplace and use wall-wash fixtures to highlight texture and create dramatic shadow lines.
Why Choose a Stone Wall for Your Living Room?
Stone walls deliver three things that few other materials can match: durability, texture, and timeless appeal. Unlike drywall or wood paneling, stone doesn’t dent, scratch, or need repainting every few years. It’s a permanent upgrade that adds real value to your home.
From a design standpoint, stone introduces depth and dimension that flat surfaces can’t replicate. The natural variation in color, shape, and texture creates visual interest without overwhelming the room. A well-placed stone wall also serves as a natural focal point, perfect behind a TV, fireplace, or seating area.
There’s also the practical side. Stone provides excellent thermal mass, which means it absorbs and radiates heat, helping regulate room temperature if you have a fireplace or wood stove. It’s also non-combustible, making it a safer choice around open flames compared to wood or fabric finishes.
Finally, stone works with nearly any style. You can go rugged and rustic with rough-cut fieldstone, sleek and modern with smooth stacked panels, or somewhere in between with tumbled ledgestone. The material adapts to your vision instead of dictating it.
Popular Stone Wall Types and Materials
Choosing the right stone type makes or breaks the project. Here’s what you’ll actually find at stone yards and home centers, along with what each material brings to the table.
Natural Stone Veneer
Natural stone veneer is real stone that’s been cut into thin slices, typically ¾” to 1½” thick, so it’s lighter and easier to install than full-thickness stone. Common types include limestone, granite, slate, and quartzite. Each has its own color palette and texture.
Veneer is sold in flat pieces (ashlar) or irregular shapes (mosaic). Ashlar veneer gives you clean, stacked lines that work well in contemporary spaces, while mosaic veneer creates a more organic, cottage-style look. Expect to pay $8–$20 per square foot for materials, depending on the stone type and region.
Installation requires a clean, structurally sound wall. For interior work, you’ll apply a scratch coat of mortar, press the stones into place, and finish with grout or dry-stack (no visible grout lines). Natural veneer is heavier than manufactured options, so make sure your wall framing can handle the load, drywall alone won’t cut it. You may need to add ½” cement board or wire lath as a backer.
One advantage: natural stone ages beautifully. It won’t fade or chip like some synthetic products, and each piece is genuinely unique.
Stacked Stone and Ledgestone
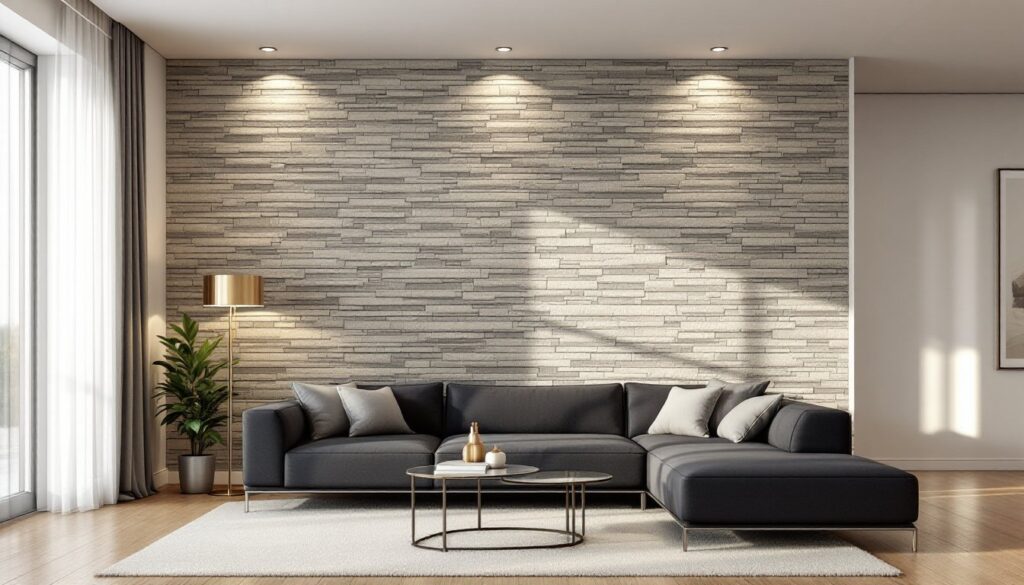
Stacked stone and ledgestone refer to the installation style, not the material itself. These are narrow, horizontal strips of stone (natural or manufactured) that lock together like puzzle pieces, creating a layered, three-dimensional effect. Many modern interior design ideas incorporate stacked stone for accent walls because of the strong shadow lines and contemporary feel.
Manufactured stacked stone (also called faux stone or cultured stone) is made from concrete and iron oxide pigments, molded to mimic natural stone. It’s lighter, more uniform in size, and typically costs $6–$12 per square foot. Installation is faster because the pieces are calibrated to fit together with minimal trimming.
Ledgestone has a more pronounced horizontal profile, think thick, staggered ledges rather than tight stacks. It’s dramatic and works especially well on taller walls or around fireplaces where you want strong vertical lines.
Both styles can be installed with mortar (traditional method) or as panel systems with interlocking backers that screw directly to studs. Panels speed up DIY installs but limit your layout flexibility. If you’re going the mortar route, budget time for grouting and sealing. Unsealed stone will absorb moisture and stains, especially in high-traffic living rooms.
Design Ideas for Different Living Room Styles
Stone is versatile, but you still need to match the material and layout to your room’s overall vibe. Here are proven combinations that work.
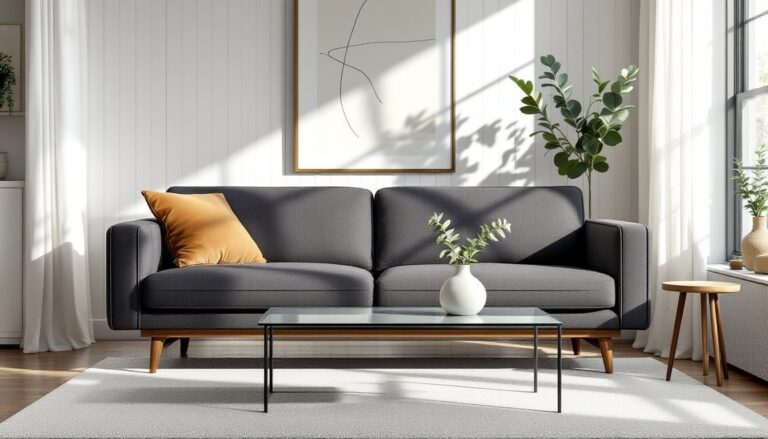
Modern Minimalist: Go with smooth, cut stone veneer in neutral tones, whites, grays, or soft taupes. Install it floor-to-ceiling on one wall, keep grout lines tight and uniform, and pair it with sleek furniture and minimal decor. Avoid busy patterns: let the stone’s natural texture do the talking. A single wall behind a floating media console or low-profile sectional creates a clean focal point without clutter.
Rustic Farmhouse: Rough-cut fieldstone or tumbled ledgestone in earth tones (browns, ochres, creams) nails this look. Dry-stack installation (no visible grout) enhances the organic, old-world feel. Pair with reclaimed wood beams, vintage lighting, and cozy textiles. If you have a fireplace, extend the stone surround all the way to the ceiling for maximum impact.
Industrial Loft: Thin brick veneer or dark gray stacked stone works well here. Embrace imperfections, uneven edges, visible mortar, slightly rough textures. Combine the stone wall with exposed ductwork, metal accents, and Edison bulb fixtures. Many architectural features in industrial spaces lean into raw, unfinished materials, and stone fits right in.
Transitional/Classic: Mixed-profile ledgestone in mid-tone grays or tans offers a balanced look that’s neither too rustic nor too modern. Add a wood mantel or built-in shelving to soften the stone’s hardness. This style plays well with both traditional furniture (rolled-arm sofas, wingback chairs) and more contemporary pieces.
Coastal/Beachy: Whitewashed or pale limestone veneer keeps things light and airy. Pair with natural wood tones, woven textures, and soft blues or greens. Avoid heavy, dark stone, it’ll clash with the breezy aesthetic.
Accent Wall Placement: The most common spot is the TV wall or fireplace wall, but don’t overlook the wall behind a sofa or dining area if your living room is open-concept. Just make sure the stone doesn’t compete with other strong features. One statement wall is enough.
Lighting Matters: Stone’s texture comes alive with the right lighting. Install recessed cans or wall-wash fixtures at the top or bottom of the wall to create shadows and highlight the stone’s depth. Flat, overhead lighting will flatten the texture and kill the effect.
DIY vs. Professional Installation: What You Need to Know
Stone veneer installation is doable for an intermediate DIYer, but it’s not a weekend warrior project if you’ve never worked with masonry. Here’s the honest breakdown.
DIY Prerequisites:
- Experience with mortar mixing and trowel work. If you’ve laid tile or built a retaining wall, you’ve got a head start.
- A solid wall substrate. Drywall alone won’t support stone veneer. You’ll need to install ½” cement backer board (like HardieBacker or Durock) over studs, secured with 1¼” cement board screws every 8″ along studs.
- The right tools: notched trowel, mixing drill with paddle, wet tile saw or angle grinder for cutting stone, pointing trowel for grout, level, and spacers (if using a uniform pattern).
- PPE: Safety glasses, dust mask (N95 or better), gloves, and ear protection when cutting stone. Silica dust from cutting is a serious respiratory hazard, work outdoors or use a wet saw with dust collection.
- Time and patience. A 100-square-foot wall can take 15–25 hours for a first-timer, including prep, layout, cutting, installation, and grouting.
Materials You’ll Need (for a typical 100 sq ft wall):
- 100–110 sq ft of stone veneer (order 10% extra for cuts and waste)
- Two to three 50 lb bags of Type S mortar or thin-set (depending on stone weight)
- One to two bags of sanded grout (if not dry-stacking)
- ½” cement board and screws
- Stone sealer (penetrating sealer for natural stone, acrylic for manufactured)
- Metal lath (if installing over painted drywall or uneven surfaces)
Installation Steps (Simplified):
- Prep the wall. Remove baseboards, outlet covers, and any loose paint. Install cement board over studs.
- Dry-lay your pattern on the floor first. Mix shapes and sizes to avoid repetitive patterns or obvious seams.
- Apply a scratch coat of mortar to the backer board in small sections (3–4 sq ft at a time). Press stones into the mortar, wiggling slightly to ensure good contact.
- Maintain consistent spacing if using grout (typically ½”–¾” joints). For dry-stack, butt stones tightly together.
- Cut stones as needed with a wet saw. Angle cuts and corner pieces require careful measuring.
- Grout the joints after mortar sets (usually 24 hours). Use a grout bag or pointing trowel, then tool joints smooth with a rounded stick or finger.
- Seal the wall once grout cures (72 hours). Two coats of penetrating sealer protect against stains and moisture.
When to Hire a Pro:
- Load-bearing or structural concerns. If your wall framing is questionable, or you’re installing over an exterior wall that needs waterproofing, get a professional assessment.
- Large or complex layouts. Floor-to-ceiling installations, curved walls, or intricate patterns demand masonry experience.
- Fireplace surrounds. Code requirements for clearances to combustibles vary by jurisdiction (typically 6″–12″ from the firebox opening). A pro ensures compliance and proper flashing.
- Permits. Most interior accent walls don’t require permits, but structural changes or work near gas/electric lines do. Check with your local building department.
Professional installation typically runs $15–$40 per square foot including labor and materials, depending on stone type and region. For a 100 sq ft wall, expect $1,500–$4,000 total. Compare that to $800–$1,500 in materials for DIY, plus your time.
Common DIY Mistakes to Avoid:
- Skipping the scratch coat or using the wrong mortar type (Type N is too weak for veneer).
- Not wetting natural stone before installation, dry stone sucks moisture out of mortar, weakening the bond.
- Grouting too soon. Mortar needs 24 hours minimum to set.
- Over-grouting. Less is more, recessed grout joints show off the stone’s shape.
- Forgetting to seal. Unsealed stone will stain from fingerprints, spills, and dust.
If you’re confident with tools and willing to take your time, DIY is rewarding and saves serious money. If the wall is prominent or you’re short on time, a pro’s speed and finish quality are worth the investment. Many homeowners explore a range of kitchen and bathroom remodel ideas that include stone features, often opting for professional help on high-visibility installations.
Conclusion
A stone accent wall transforms a living room from ordinary to unforgettable, adding texture, durability, and serious design impact. Whether you choose natural veneer, stacked ledgestone, or manufactured panels, the key is matching the material and style to your space, and being honest about your skill level. Prep work, proper substrate, and patience make or break a DIY install. If you’re ready to tackle it, the result is a permanent upgrade that’ll outlast every paint trend and Pinterest fad. If not, hiring a pro gets you a flawless finish without the learning curve.